Using Digital Images: Create
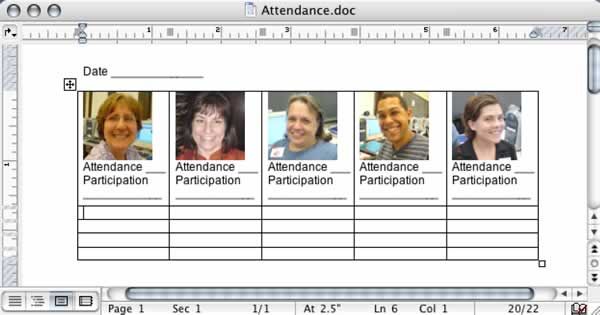
Make a seating chart for your class using the photos you took.

Step 1: Open a new Word document (or other word processor).
Step 2: Create a table (Pull-down menu, Table - Insert - Table) and fill-in the number of rows and columns to match your classroom. You can use the one I started above as a template, if you're not comfortable with making tables yet.
Step 3: Drag and drop the photos, one into each table cell.
You can also use the menus (click into a table cell. Choose Insert - Picture
- From file. Browse to choose the photo.)
Step 4: You will probably have to resize the photos.
Double click on the photo. Choose the "Size" tab. Make the
photo about an inch high (about 75 pixels).
Be sure the "Lock aspect ratio" is clicked or you might get
some funny-looking photos!
Step 5: Put the student's name under each photo.
Add another line or two under each name - to be used for attendance, participation
points, etc.

